Have you picked up a new and shiny foil shaver? If so, congrats! Now it’s time to get shaving. Learning how to use a foil shaver isn’t difficult, but it’s also not intuitive, especially if you’ve only shaved with manual razors before.
To help you make the most of this wonderful shaving tool, we’ve put together this step-by-step explanation on how to shave with a foil razor. If you have any questions, jump over to our “Contact” page, and welcome to the wonderful world of foil shavers! They’re the BEST.

Our 11-Step Guide to Using a Foil Shaver
In this step-by-step guide, we cover each element of shaving with a foil shaver in detail so you can feel totally prepared no matter your previous experience.
But first, a quick note: Check the battery on your shaver before you start reading this guide. If it’s low, plug it in now and it’ll be ready to use by the time you’re done reading. OK:
Step #1: Prepare Yourself
Since foil shavers can be used for dry shaving, it can be pretty tempting to just pick up your shaver and go to town. That, however, would be a mistake! Even with a capable foil shaver, there’s still a risk of cutting the skin, so it’s important to always start out clean and fresh.
At the very least, we recommend you wash with a beard or face wash. To wash, splash your face with water, and then dispense a bit of product in your palm. Massage your face with the face wash, and finally rinse it all away with a bit of lukewarm water. If you want to save time, you can do this in the shower, which will also allow the steam to soften your whiskers.
You can also take the chance to exfoliate your skin to remove dead skin cells (this is great for preventing ingrown hairs!) or apply a pre-shave oil for a smoother glide. If your foil shaver is waterproof, you can also use a shaving soap or cream to create a lather, for extra protection and cushioning.
Step #2: Trim if Necessary
If your facial hair is so long that you can’t even call it stubble anymore, chances are you’ll need to trim it before you can shave it off.
Most foil shavers are designed to only shave away very short hair, so they struggle with longer whiskers. A few deluxe models can handle up to a week’s worth of beard growth, but they’re quite rare.
You can use any kind of stubble trimmer, but you can also check to see if your foil shaver is designed with a pop-up trimmer. Those pop-up trimmers on foil shavers aren’t convenient on a regular basis, but they can be life-savers if you only need their help occasionally.
Step #3: Map Out Your Shave
Next, it’s good to have an action plan, especially if you’re new to shaving altogether. Foil shavers are designed to shave against the direction of hair growth, which is opposite to how we recommend shaving with manual razors.
That means you need to know in which direction your hair grows on different parts of the face. Here’s how it works for most men:
The hair on the cheeks, chin, and jawline grows downwards, so you’ll want to shave upwards;
The hair on the mustache area grows downwards in the center, and on an outwards diagonal above the corners of the lips;
The hair on the neck is the most complicated: At the top it grows downwards, on the sides it grows inwards, and at the bottom of the throat it grows upwards.
However, every face is a little different, so run your hands over your facial hair to identify your unique growth patterns. Once you have it figured out, shaving is easy—you’ll need to move your foil shaver in straight lines going in the opposite direction of growth.
Step #4: Start Where You’re Sensitive
Some guys like to start with the face and move down to their neck—that’s perfectly okay! However, if your foil shaver tends to heat up, you may want to start shaving the areas where you’re a little more sensitive. For most guys, that means starting with the neck, and then moving your way up to your face. Finally, you can finish off with the hard-to-reach mustache area.
We’ve titled this section, “Start Where You’re Sensitive,” but we know that there are a lot of guys out there who don’t have a sensitive area on their face, because their entire face is sensitive! If that’s the case, go slow and take it easy, and find what works for you. Make sure your face is clean when you shave, experiment with shaving soaps/creams for sensitive skin, and maybe consider an electric shaver designed for sensitive skin. Foil shavers are better than rotaries for sensitive skin, but if you find that neither works for you, you can always consider safety razors.
If you’ve got delicate skin, we feel your pain, and it can take a while to find what works for you!
Step #5: Know Your Angle
Here’s the part in our “How to Use a Foil Shaver” guide where the pedal hits the metal—where you actually shave.
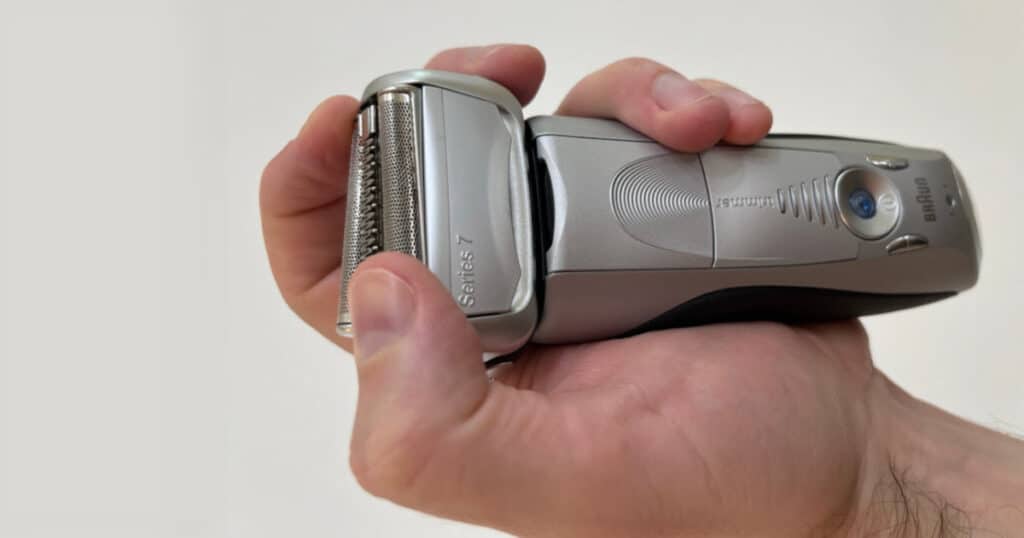
To actually shave, you need to hold the foil shaver against your skin at a 90-degree angle. In other words, if you’re shaving your cheek, you should be holding the shaver so it’s fully horizontal and perpendicular to your face.
It can be a little odd at first if you’re used to cartridge razors, since you’re meant to hold them flush against the skin. However, once you get started, you’ll get used to it pretty quickly, and good foil shavers (like many of the models made by Braun) can make that transition pretty easy.
Step #6: Hold Your Skin Taut
In areas where you have folds or your skin is lax, you’ll want to hold your skin taut with the hand that’s not holding the razor. This will straighten out your skin so your shaver has a smoother path. It’ll prevent accidents and make sure that all hair is shaved off evenly.
Whether this is necessary also depends on the shape of your face. Some men may want to hold their skin taut for every stroke, while for others it may only be necessary for hard to reach spots like under the jawline. When shaving above the lip, you can stick your tongue to push the skin forward from below—it’s a little strange to get used to, but it achieves the same effect!
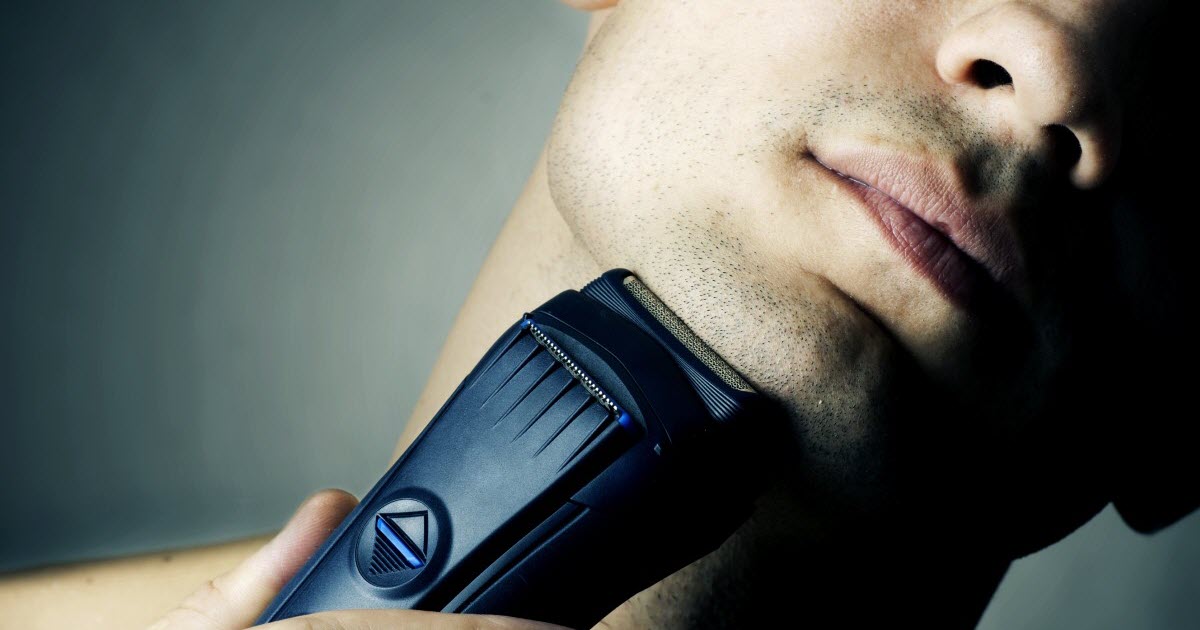
Step #7: Shave in Short Strokes
Now that you have an action plan and you understand at which angle to hold the shaver… It’s time to actually shave! Turn on your razor, and bring it against your skin. Immediately start moving it in short strokes going in one direction. To keep things gentle, make sure to apply as little pressure as possible.
The reason for short strokes is simple—it allows you to ensure you don’t miss any areas, while lifting the razor periodically prevents hairs from snagging on the blades and getting pulled on.
One benefit of foil shavers is that repeated strokes aren’t likely to irritate your skin, so if you miss any spots, you can just go over it again. Just be careful to only move the shaver up and down when it’s in contact with your skin. If you need to move it sideways, lift it away from your face first.
Step #8: Adjust as Needed
As you shave, you’ll feel more comfortable with your foil razor. There isn’t a big learning curve to shaving with a foil (especially with recent models designed for home use), so you’ll probably feel like you have a good hang of it before you’ve even finished your first shave.
While we’ve covered the basic steps of shaving with a foil, don’t be afraid to make your own adjustments. Maybe you feel like one area has coarse hair where a little more pressure is necessary, or perhaps there’s a part of your face where hairs truly grow in every direction, but you think you’ve figured out that shaving sideways deals with most of them well.
On the other hand, if you have an old-school or barbershop-style foil shaver from brands like Andis or Wahl, there’s less room for error and you may want to practice for a little longer before going rogue.
Step #9: Examine Your Work
Once you think you’ve finished your shave, it’s always a good idea to look things over one more time. Foil shavers can be quite large and sometimes it’s easy to miss a spot.
The wonderful thing about foil shavers is that if you think you need to go over an area again, you generally don’t have to worry about the process irritating the skin. If you notice any missed hairs, just go ahead and shave those areas again following the same technique. You might realize that you were wrong about the direction of hair growth in a small area, in which case you can adjust your direction.

Step #10: Don’t Neglect Your Aftercare
Once you’re definitely done shaving, don’t skimp on your post-shave routine! It can be tempting to let it slide since foil shavers aren’t particularly irritating, and if you’ve dry-shaved, it’s not like you have anything to rinse off. However, even foil shavers can take a bit of a toll on the skin.
So first, rinse your face with cool water as part of your aftercare. The cool water will remove any shaving debris and it’ll also help calm your skin a little. After that, pat on a bit of alcohol-free aftershave splash or balm to soothe the skin. Lastly, if it’s daytime and you’re planning to head outside, don’t skimp on sunscreen!
Step #11: Clean and Store Your Shaver
And there you have it—your freshly shaved mug is ready to face the day, and you’re all done. Just don’t forget to deal with your shaver! After doing such hard work getting your face all nice and smooth, your foil shaver deserves a bit of TLC, as well.
First, deal with the stubble that’s stuck in the compartment under the foils. With most foil shavers, there’s a quick-release button to open it up. Then, you can tap the shaver against the side of your wastebasket to remove all of the hairs trapped inside, and use a small plastic brush to dislodge very persistent hairs.
If it’s okay according to your product manual, you might also be able to rinse the blades under the tap. If you rinse it, pat the individual parts to remove excess moisture, and then let them air dry completely before you reassemble. If necessary, don’t forget to charge your shaver for the next use.
Finally, don’t forget to give your foil shaver a more thorough clean and lubrication at least a few times a month, to keep the blades sharp and moving smoothly.
Other Things to Consider
Depending on your personal preferences or the type of foil shaver you own, here are a few other factors you may want to consider before you start shaving:
Wet or Dry Shave?
One of the benefits of using a foil shaver is that you don’t have to worry about making a mess with water and shaving cream. That said, most of today’s foil shavers are actually waterproof, so if you want to use a shaving cream, you absolutely can!
If you do own a waterproof foil shaver, you can play it by ear! If your skin is pretty tough, a dry shave can be your go-to, especially if you’re in a rush. If your skin happens to feel sensitive or you want to have an extra-close shave, using a shaving cream can help smooth things out and will allow you to get a little closer with your foil shaver.
Pressure
Generally, it’s better to keep your pressure as low as possible. Getting a close shave has a lot more to do with holding your razor at the correct angle than it does with applying pressure. That said, sometimes there is a bit of leeway.
While you should always start off light, you can experiment with applying a little more pressure if you feel like it’s necessary. Modern shavers usually have some flexibility in the head, so the blades will get pushed back a little instead of catching on your skin.
Angle and Direction
Much like with pressure, another thing you might be able to play with is that 90-degree angle and the direction in which you shave. You should definitely master holding your shaver perpendicular to your face, but as you gain experience, you may discover that holding your razor at a more acute angle over certain areas works better.
Shaving Other Areas
Lastly, while this guide focused on how to shave your face with a foil shaver, almost all of these steps also apply if you decide to shave your head, chest, or any other body part. A lot of foil shavers give a great shave from head-to-toe, so don’t feel restricted to only shaving your face.
Your Most Helpful Foil
A foil shaver is no foil! It’s a supremely useful tool that makes shaving easy… as long as you know what you’re doing. We hope that you feel confident about tackling your whiskers with your foil shaver. Good luck, be good, and happy shaving!
Michael Morris is the head writer here at Rough and Tumble Gentleman. He's got a ducktail beard and loves Brazilian jiu-jitsu. He's married to the woman of his dreams and lives in Brooklyn, NY.