Welcome! In this post, we’re going to provide an in-depth guide to wet shaving technique. In it, we’ll describe every step of the wet-shaving process, discuss all the tools you need, and offer some guidance on how to make your wet shaving routine, beginning to end, a pleasant and enjoyable experience. Let’s dive in.
Prepare Your Shave
One of the aspects of wet shaving that makes it truly effective—and truly great for sensitive skin—is the pre-shave prep. Each phase of the pre-shave readies the skin to receive the razor blade, and each contributes to a close and hopefully irritation-free shave. Here are all the pre-shave steps that’ll ready your skin for shaving. You’ll need to:
Get Your Gear Ready
There’s a fair bit of equipment involved in wet shaving, and it’s best to have every set out in front of you and ready to go. You’ll want to:
Ready Your Shaving Brush. Get a cup or bowl of warm water, and let the brush sit in it while you shower or wash your face. Shaving brushes react well to warm water, and submerging it in water will allow the bristles to absorb some heat and moisture, and both of those items are good for your skin when shaving. Keep in mind, you want the water warm, and not hot—hot water can damage the glue that holds the bristles in the brush, and it can do a bit of damage to the handle, as well. We talk more about shaving brushes in the “Build a Lather” section, below.
Make Sure You’re Using a Sharp Razor. If you’re using a safety razor, you’ll want to make sure your blade is sharp. Most razor blades will provide four to five close shaves before they need to be replaced, and you’ll know they need to be replaced when you feel them tug and/or pull at your whiskers when you slide the blade over your face. Blades are very easy to replace, so don’t try to make them last too long—dull blades can wreak havoc on your face, and can result in nicks, cuts, irritation, razor burn, and an all-around unpleasant shave.
If you’re using a straight razor, strop the blade to make sure it’s sharp. Stropping is a topic unto itself and beyond the scope of this post, so we’ve written a few tutorials about it.
If you’re not certain about the different types of razors used in wet shaving, we’ve written a detailed post about that, too, so be sure to check it out.
Arrange Your Pre-Shave Oil, Cream or Soap, and Aftershave. You’ll be using these items during later phases of the shave, so arrange them on your counter-top where you’d like them.
By the way—setting up your gear depends largely on your living situation. If you have roommates or a romantic partner and need to share space, you may want to use a shaving kit, that holds your safety / straight razors, your creams / soaps, your shave brush and bowl, and so on. If you’re bathroom real estate is limited, you can keep all that gear in a kit and simply bring it over to your sink when you’re ready to shave, and you’re good to go. If you’re living the dream and you have your own bachelor pad, arrange your gear any way you want, you lucky bum.
Soften Your Facial Hairs and Open Your Pores
This is another integral step in our guide to wet shaving. As we’ve written elsewhere, even though shaving is a universal activity, it’s not really a natural process, and it’s a bit traumatic for your skin. You need to prepare you skin for the razor, and the best way to do that is to soften your whiskers and open the pores on your skin using heat and water. To do so, you’ve got two options. You can:
Take a Shower. This is how most men approach shaving: take a nice warm-to-hot shower, and let the steam and water relax the skin of your face. Give your face a good scrub to exfoliate and remove some dead skin. Take it easy, though—no need to scrub too hard. When you get out of the shower, you’ll be ready for the next step.
Steam Your Face with a Hot Towel. If you’ve ever gotten a shave at a barber shop before, you’ll notice that they prepare you for the shave by soaking a towel in warm water and applying it to your face for a few minutes. The practice achieves the same end as a shower, and opens pores and softens whiskers.
If you don’t have time for a shower and you don’t have time for a towel, run some warm water over your face before you get started. It’s not as good as a shower or a towel, but it’ll get the job done, and you really do need to prepare your face for shaving—shaving without opening those pores can result in irritation.
Use Pre-Shave Oil
Using pre-shave oil after a shower or hot towel is an incredible one-two punch that further prepares the skin for shaving. The shower / hot towel opens pores and softens whiskers. Pre-shave oil (sometimes simply called “shave oil” or “shaving oil”) sits on top of your skin but beneath the shaving cream (to be discussed later), and provides a protective, lubricating layer that allows your safety razor or straight razor to glide smoothly over your face, while also keeping moisture inside your skin, making it pliant and elastic. If you’ve got sensitive skin or find that shaving causes you irritation, pre-shave oils may be a wonderful addition to your shaving routine.
It’s very simple to use, and it’s one of those “a little dab’ll do ya” products—you only need a few drops of the oil (perhaps four to eight) to coat all the areas of your face that you’re going to shave (and, we should say: you only want to use pre-shave oil on the parts of your face you’re going to shave. Pre-shave oil does not belong on your forehead). Drop the oil into your hands, give your hands a quick rub back and forth, and then massage the oil onto your cheeks and jawline and chin and neck. You don’t need to use too much pressure—a light brushing will do it. You just want to coat the skin a little bit.
It may foam a little bit—some pre-shave oils do that, while others don’t—and then you want to use some warm water to wash some of it off. No need to wash vigorously—you don’t want all of it to come off, just the excess.
In addition to its main purpose of providing a protective layer over you skin, pre-shave oils have some nice secondary characteristics: many are all-natural and contain skin-fortifying vitamins (like Vitamin E) as well various other anti-oxidants, most have moisturizing properties, and some smell wonderful: you can find pre-shave oils with lavender scent, cedarwood, sandalwood, tea tree, eucalyptus, and more (and of course, if you don’t like any of those aromas, you can find scent-free pre-shave oils, as well).
There are many makers of pre-shave oil, and the best known are probably Truefitt & Hill, Taylor of Old Bond Street, Leather and Wood, and The Art of Shaving. They all offer excellent pre-shave oils, and there’s a version made by Executive Shaving that we also like. Each has a different consistency—some are thin, while others are thicker—so you may want to experiment with a few different types before settling on one you like.
After pre-shave oil, you’re ready to…

Build a Lather
For a lot of wet shavers, the lather is one of the most enjoyable parts of a shave. Here’s what you need to do:
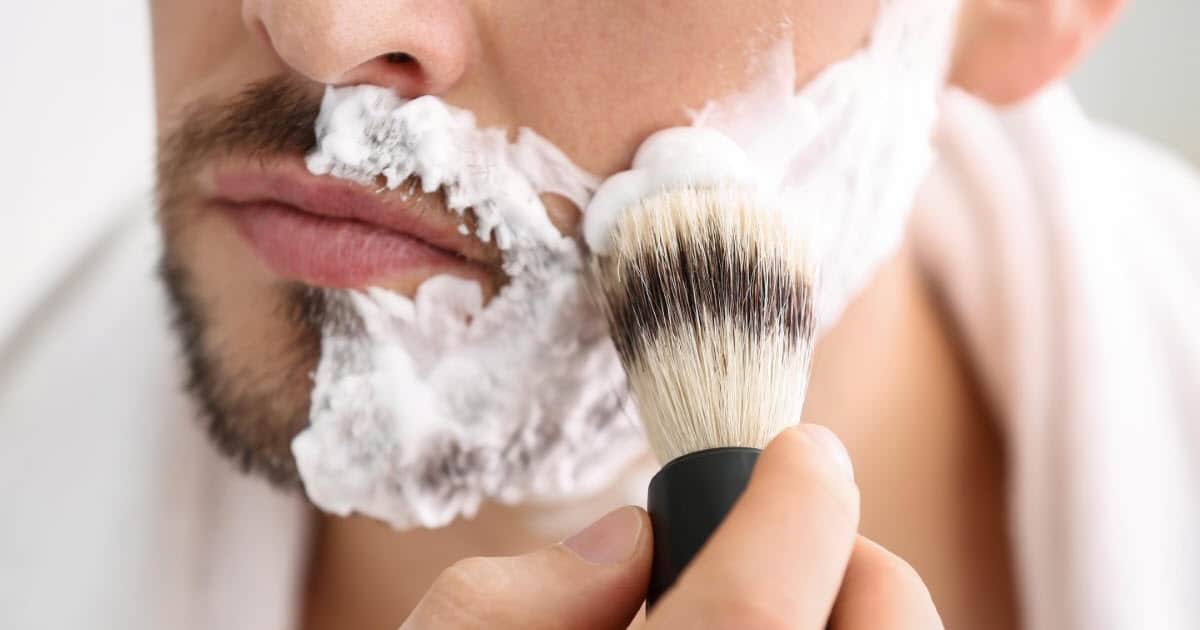
Grab Your Shaving Brush
If you’re new to wet shaving and start to read about the topic in various wet shaving forums, you may be surprised to find that wet shavers make a big deal about shaving brushes. There’s a reason for that: a good shaving brush can make a thick, rich lather that is vastly superior to something shot out of a can and spread across your face with your fingers. A shaving brush full of creamy lather feels incredible, and using an incredibly soft brush to sweep that warm lather onto your face—it just feels amazing.
For a lot of wet shavers, brushes are prized possessions, so here’s a quick crash course on shaving brushes:
There are Different Parts of a Shaving Brush. Shaving brushes look pretty simple, but there are actually distinct parts that make up a brush: the handle contains the knot of hairs that constitutes the brush itself, and can be made from wood, plastic, any number of exotic materials; the knot, which is the area where the hairs of the brush are tied together and attached (usually by glue) to the handle; the loft, which refers to the height of the bristles (or the length, if you will) from the knot at the handle to the tippy-top of the brush; and the shape of the hairs, which are usually bulb-shaped (meaning, rounded at the top of the brush) or fan-shaped (which are flatter at the top of the brush).
Different Materials are Used for the Brush Hairs. In general, there are four types of materials used for brush hairs: badger hair (which is widely considered the best material for shaving brush hairs), boar hair, horse hair, and then synthetic hair. We’ll talk about badger hair in a second, but here’s a quick run-down of the other types of hair: boar hair brushes make great “beginner” brushes, even if they may take a while to break in and are slightly prickly; horse hair brushes are also a good option for beginners, and pretty soft, but may get tangled up near the knot; and finally synthetic brushes are man-made, but can be very soft and effective, and are a great option for vegans and anyone else concerned about the treatment of animals.
Badger Hair is Widely Considered the Best, and Has Different Grades. The grades of badger hair are pure, best, super, and silvertip. “Pure” is the most common type of badger hair, and is soft and firm but not as soft and firm as the following grades; “best” is a step up from “pure,” but in a somewhat confusing twist, does not mean “THE best” badger hair; “super” is a step up from best, with hairs that are soft and not at all prickly; and finally, “silvertip,” which is the highest-grade and ACTUAL best type of badger hair. As you travel from “pure” to “best” to “super” to “silvertip,” the hairs become softer and more plush, and hairs themselves retain more water, which is a boon for building a lather.
The Color of Each Type of Badger Hair Varies According to Quality. As you travel up the “quality” of hairs, the color of the hairs goes from dark to light. Pure badger hair is typically very dark; pure badger hair is typically a little lighter than that; super badger hair will have an off-white hue; and silvertip hairs will have—you guessed it—a silver-ish tip that’s white-ish or silver-y or a very light tan.
Brushes Typically Need a “Breaking In” Period. Shaving brushes get better with age, and if you’ve recently gotten a new one, the hairs will soften after a couple of uses. Also, there may be a faint “animal” smell to it—that’s not uncommon—and that’ll go away after a while too. As you’d guess, that animal smell isn’t a feature of synthetic brushes.
Take Care of Your Brush, and You’ll Have it for a Long While. Following every shave, use warm water (again—not hot water; very hot water may damage the glue in the knot) to rinse free any lather left over in the brush, and give a little shake to chase any extra moisture out, if you like. You can store your brush upside-down in a stand, or right-side up on the base of the handle; either one should be fine.
So now that you know a thing or two about brushes, let’s move on to the next step in our guide to wet shaving…
Grab Your Shaving Cream or Soap and Make a Lather
So you’ve had your shaving brush soaking in warm water while you shower or while you warm and wash your face with a towel, and you’re ready to step up to the mirror and make a lather. You’ve got two options: shaving cream or shaving soap. They both create a fantastic lather with a lot of “cushion,” but they’re a little bit different.
Shaving Creams are relatively new, in the grand scheme of things, and they’re very easy to use (which makes them a great option for beginners). They usually come in small, decorative tubs, and the cream is fluffy and white and bright. We’re not talking about shaving cream from a can—that stuff is pretty lousy—we’re talking about all-natural shaving creams designed specifically for wet shaving. They can be unscented or scented, but most feature an aroma of some kind—sandalwood, rose, peppermint, coconut, tea tree, and lavender are popular scents. In general, they build a lather more quickly than soaps—add a small dab to a shaving bowl, whisk it around a few times, and you’ve got a nice lather. If you’re new to wet shaving, you should start with these. It’s much easier to build a lather with a cream than with a soap.
To use shaving cream, scoop a small dollop of the product onto your finger, and line it on the inside of your bowl or mug or scuttle. Shake loose any water from your brush and then dip the brush into the bowl and twirl the brush around in circles. Within seconds, a nice, hearty foam should crop up. If the lather is looking a bit dry, add a little water, but go lightly, because too much water will make your lather too drippy and wet. If you don’t want to use your finger to scoop up the cream, you can lightly graze the shaving brush over the cream, and the hairs on the brush will pick up all the cream you need. Wallah! That’s it.
Shaving Soaps are old-school, and they’re the chosen lather for men who are into the “traditional” aspect of wet shaving, and in particular, men who are into straight razor shaving. They’re the original way to make a lather, and while they can make a lather that’s thicker and richer than creams, they can be a little difficult to use. Usually, they’re unscented, although there are a few soap makers who are adding scents to their products.
To use soap, pour a little bit of warm water on top of it, and wait a second or two for it warm up a bit. Then take your shaving brush, and lightly swirl the brush on top of the soap for a few moments. When you see the brush collect some of the soap, transfer the soapy brush to a shaving bowl and keep swirling. It may take a little while—as we mentioned, soaps are a little more challenging than creams—but you see a vibrant lather pop up within minutes.
There you go! Lather, built. Some notes you may want to keep in mind:
Apply Lather to the Face Using a Circular Motion. This is the best part about lather: applying it. Ahhhhhhhhhhhhh. So nice and warm. Take the loaded shaving brush and move it over your cheeks and mouth and jawline and neck using a sweeping, circular motion.
Some Terminology. Getting lather into your shaving brush is called “loading” the brush. If you ever visit a wet shaving forum and they talk about loading the brush, that’s what they’re referring to.
Start Dry. When building a lather, be sure to go light on the moisture. Too much water makes a lather runny and soppy. You can always add water, but you can’t ever take it out, so start with only a little bit of water and add more as you need it.
A Little Goes a Long Way. A very small amount of shaving cream will produce a nice, thick lather—it’s one of those “less is more” things. And just like with moisture, you can always add more cream if your lather isn’t dense enough.
Shaving Cream from a Can is Garbage. You’ll notice that we mentioned above that canned shaving cream is lousy. It is. It’s full of chemicals, additives, and colorants that are awful for your skin. Shaving creams designed for wet shaving are usually all-natural and are actually good for your skin. We’ve yet to come across a canned shaving cream that meets the standard set by wet shaving creams.
There Are Plenty of Fantastic Creams to Choose From. As for makers of creams and soaps, Taylor of Old Bond Street Sandalwood Shaving Cream is a fantastic option, as is Truefitt & Hill 1805 Shaving Cream; as far as soaps go, Proraso Shaving Soap is one of our favorites, and widely liked. Plenty of options.
There’s an Art to Building a Lather. Believe it or not, you’ll get better at building a lather over time! It seems incredibly simple, and it is, really—if you start with a shaving cream, you’ll build a nice lather in no time—but you’ll actually get better at it the more you shave, and you’ll be able to consistently create a consistent consistency (sorry, we couldn’t help ourselves).

So now that you’re all lathered up, you’re ready for the main event, where you:
Start Your Shave
Wet shaving takes a little practice. You’re using a super-sharp razor to complete numerous passes over a very sensitive area of your body. Here’s what you’ll need to do:
Make a Map of Your Face
As you may have noticed, there are a LOT of sites dedicated to wet shaving, and by a wide margin, most of them neglect to mention the following bit of advice: you need to map a grain of your facial hair. It’s really important, and it’s bizarre that so many websites overlook this step.
Because wet shaving includes three full passes of the razor against your skin—one with the grain of your whiskers, one across the grain of your whiskers, and one against the grain of your whiskers—you need to know which way your whiskers grow, and the thing is, not every man’s whiskers grow in the same direction. As a general rule of thumb, whiskers on the cheeks grow downward, and whiskers on the neck grow towards the chin, but other than that, whisker growth is very unique and specific to each person.
So take a close at your face. Do your whiskers grow in sworls in any location? Do they grow away from your Adam’s Apple, instead of towards your chin? Are there any irregularities, where hair grows on one side and not the other? Make a mental note for anything you find.
If you’re not able to fully map your face during your first couple of wet shaving sessions, have no fear. Over time, you’ll develop a very precise, very accurate understand of the directions your whiskers grow, and how to go about shaving them correctly. Know the direction your whiskers grow make your second and third pass a lot easier, and they greatly reduce a lot of post-shaving skin irritation.
Choose Your Razor and Blade
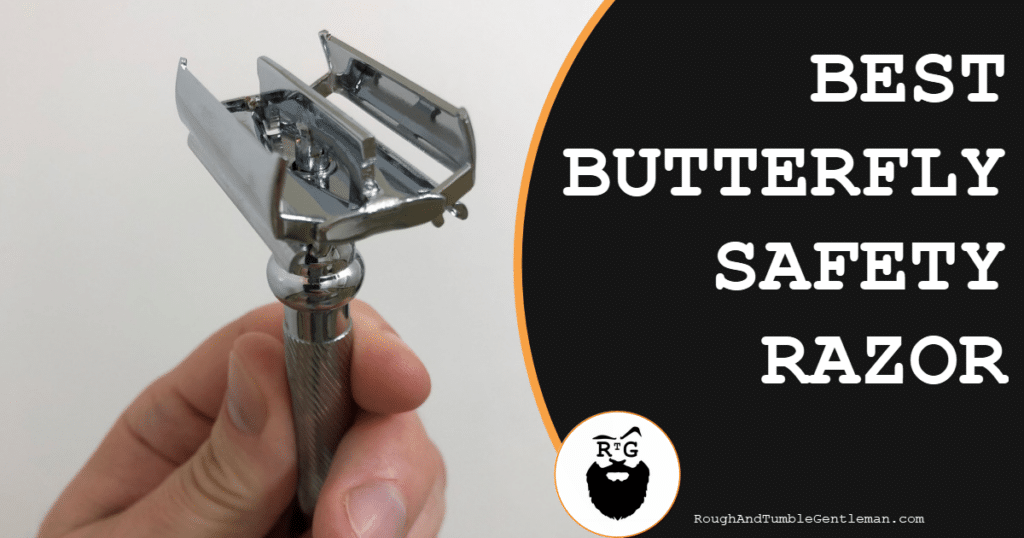
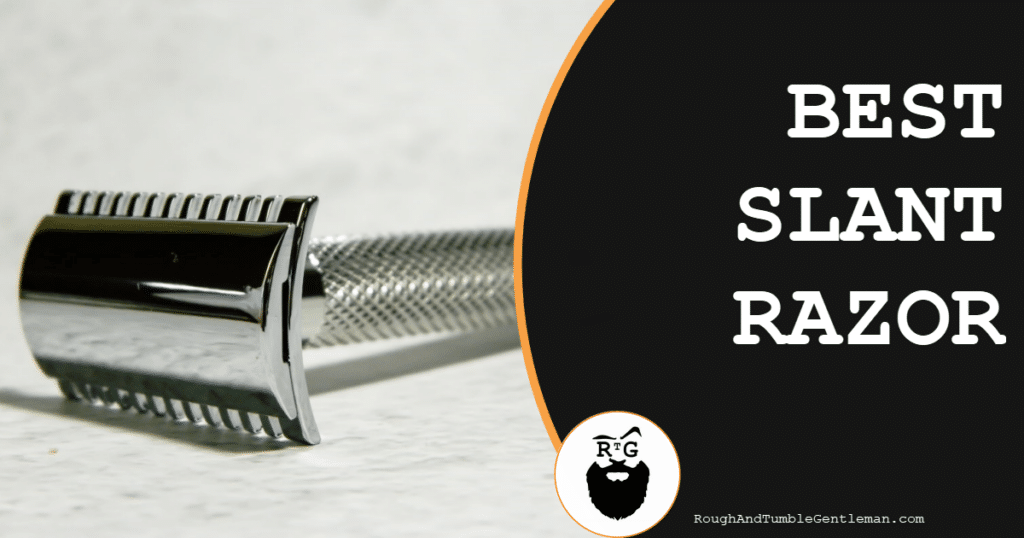
We’ve written a long and detailed post about the various types of razor blades you can use when wet shaving, but we’ll include a very brief overview of the two main types of razors you can use. There are safety razors, that look like this:

If you’re new to wet shaving, you’ll want to start out using a safety razor. They’re very sharp, but there are some “non-aggressive” versions available that are great for newbies, and the Merkur Solingen is a great example. It’ll provide a very close shave, but it’s not too aggressive, and you’ll be able to learn how to wet shave using it. You’ll need to load it with a razor blade, and change that blade every three to six shaves. Once you feel that the blade it tugging or pulling at your whiskers, you know it’s time to get a new one.
Straight razors look like this:

and they’re incredibly sharp. If you’re new to wet shaving, you want to stay away from straight razors for a while. Build up your skills using a safety razor, and then learn (carefully!) how to use a straight razor. Seriously—those suckers are sharp.
Take Three Passes
So you’ve got your safety razor in hand, your face is all lathered up, and you’re about ready to start shaving. Traditional wet shaving includes three passes, so let’s take a look at each one.
With the Grain. This is the easiest pass, and usually results in the fewest nicks. Using your facial map, shave with the grain of your whiskers, and go over each area of your face until you’ve removed all the lather you applied. Once you shave over an area, don’t shave it again until the next pass. Re-shaving an area without shaving cream is a great way to get cuts and nicks and irritation, and you’ll re-cover all the same “facial acreage” in the next two passes. If you find that your safety razor gets a little jammed up with longer whiskers, loosen the head of your razor, run the razor under water from the faucet, and chase those suckers out.
Across the Grain. Grab your shaving brush again, and re-lather your face. You’ll now shave across the grain of your whiskers. It may feel very odd, so take it slow, and don’t be afraid practice only on the “easier” areas, such as your cheeks above the jawline. That’s one of the simpler parts of your face to shave across, so don’t feel bad if you do that and then call it a day. Practice makes perfect, and your first couple of times shaving across the grain truly do feel odd.
Against the Grain. The last pass, that gets your face baby-butt smooth! Re-lather once again, as you never want to shave over un-protected skin. Shave slowly and carefully against the grain, and be certain not to shave over any portion of your face that doesn’t have shaving lather on it. For some men, the third pass against the grain is a doozy, and can result in facial irritation and bumps. If you experience that, it may be because you’re new to wet shaving and don’t quite have the hang of it yet—and that describes just about everyone who’s new to wet shaving—or it might be that going against the grain results in bumps, even when you know precisely what you’re doing. Time will tell. Take it easy, be safe, and do your best.
There are a couple of things to keep in mind as you shave:
30 Degrees is Where It’s At. Hold the blade against your skin at a 30-degree angle, and you’ve get a close shave and lower the chances of nicks and cuts.
Easy Does It. New wet shavers—particularly those who are used to disposable razors—underestimate how sharp the blade is, and how efficient safety razors are. You only need to apply the slightest bit of pressure against your skin when shaving, so let the razor do the work for you, and shave with a light touch.
A Dull Razor is Dangerous. Don’t be stingy with your razor blades—replace them every three to six uses, or until you feel them “tugging” at your whiskers. Dull razors are dangerous.
Switch to a New Razor for Your Third Pass. If you’re having trouble with that third pass, you can switch to a less-aggressive razor. No shame in it.
Do Some Clean Up. You may find that even after three passes, you have a couple of “straggler whiskers” at the bottom of your neck or by your ears—give those a swipe and shave them off.
And that’s it! You’ve almost completed your wet shave. Rinse your face with some warm water and…
Do Some Post-Shave Maintenance
Believe it or not, there’s a lot of important stuff that happens after the shave. We tend to think of the shave as the most important part of the process, but the follow-up is important, too. You’ll want to:
Give Your Face a Rinse
No matter how thoroughly you shave, there’s probably a little bit of lather left on your face, so draw some cool warm and splash it about. The cool water will wash away and residue, but it will also close up your pores.
Get yourself a nice fluffy towel and pat yourself dry—no rubbing, as that can cause irritation—and then rinse out your shaving brush to get any extra lather out of it. You can store your shaving brush on the base or hanging downward; it doesn’t really make a difference.
Then, if you’re bleeding a little bit from your shave, you can…
Use an Alum Block
If you’ve gotten any weepers (aka, cuts during shaving), you may want to consider using an alum block. Alum is a natural mineral, and it looks a little bit like pale white marble. It’s used to close up any nicks or cuts you’ve gotten during shave. It works incredibly well—no more putting bits of tissue over your cuts—but man, it stings! It’ll really get your attention. It’s a bright, sharp, nerve-popping experience. It fades very quickly, though, and it works really well, so it’s definitely worth using.
Most men wash the alum block off their face after using it, so if you’ve rinsed the excess shaving cream off your face, and then added alum block, you may want to rinse once again with cold water. Alum block does leave a little residue, so you’ll want to get that off.
Slap on Some Aftershave
Aftershave has a bum rap. For years, men used too much of and stank up the joint, and aftershave went out of style for a long time. Wet shaving companies got the message, and basically reinvented the product. It used to be that aftershave was only sold as a liquid, but now it’s sold as a liquid (usually called “splash”), or as a lotion, or as a balm. Here are some notes about each:
Aftershave splashes are still sold and still popular with many men, but a lot of guys avoid them, because they usually contain alcohol. Alcohol has some fantastic bacteria-killing properties, but it’s known to cause dryness and irritation on the skin (and pain to any cuts you’ve got on your face). If alcohol doesn’t irritate your skin, these can be a good option (but do be aware that it may dry your skin out).
Aftershave lotions have become very popular in recent years. Many contain essentials oils (like tea tree oil) and astringents (like witch hazel) that are fantastic for your skin. They also come in a number of appealing scents.
Aftershave balms are a lot like lotions, and contain a bunch of ingredients that are great for your skin, and are available in an array of wonderful aromas. Good stuff.
Apply the aftershave of your choice to your face, and…
You’re Good to Go!
This was a long post, but we hoped to give you all the information you need to have a satisfying and relaxing wet shave. But, as a picture is worth a thousand words (and a YouTube video worth even more), if you need a full, in-person description of how to wet shave, here is one of our favorite tutorials. The gentleman in the video is from Executive Shaving, a purveyor of fine shaving goods, and he does a fantastic job of walking you through the wet-shaving process. Enjoy!
Michael Morris is the head writer here at Rough and Tumble Gentleman. He's got a ducktail beard and loves Brazilian jiu-jitsu. He's married to the woman of his dreams and lives in Brooklyn, NY.