Most people intuitively know that clean clippers = effective clippers, and that’s great—keeping clippers sparkly and new helps prevent corrosion, keeps the blades sharp, and increases the life of the blades. That’s all wonderful. But what about understanding how to clean hair clippers? A lot of folks may not know what to do, and we’ll explore that in today’s article.
Also, people often forget the most important reason to keep clippers clean, and that’s because dirty clippers are a health concern. Dirty clippers can cause skin irritation and even skin infections, and not only that, but dirty clippers can spread that irritation and infection to others.
So, as, you’d imagine, knowing how to clean hair clippers is essential for professional barbers and hairdressers, and an absolutely must for anyone looking to use clippers on themselves or their family at home.
So with all that in mind, here’s how you do it! There’s not much too it, and you’ll be able to keep your clippers tidy and new—and safe—for as long as you have them.
Step-by-Step: How to Clean Hair Clippers
Fully cleaning and disinfecting your hair clippers requires several steps. It’s not a particularly long or difficult process, but it’s still worth it to take your time and do it right.
You’ll notice that many of the steps have different options for completing them. For that reason, we’ve included pros and cons lists as well as details about their benefits for professional vs at-home use. Additionally, certain steps or options may not need to be completed as often as others, so pay attention to that as you go along.
Step 1: Remove Hair Clippings
After even just one haircut, hair clippers end up with a lot of little bits of hair clippings trapped in the blades’ teeth and in between the blades themselves. You need to remove these to keep the clippers working correctly and prepare the blades for disinfecting, which might not work as well if the blades are covered in hair. That’s true of all types of clippers, from basic to high-end clippers.
No clippers are safe—here’s a pair after a very quick haircut, and if you look closely to you can see that there are hairs even after only a few minutes of use:
To remove the hair, you’ve usually got two options:
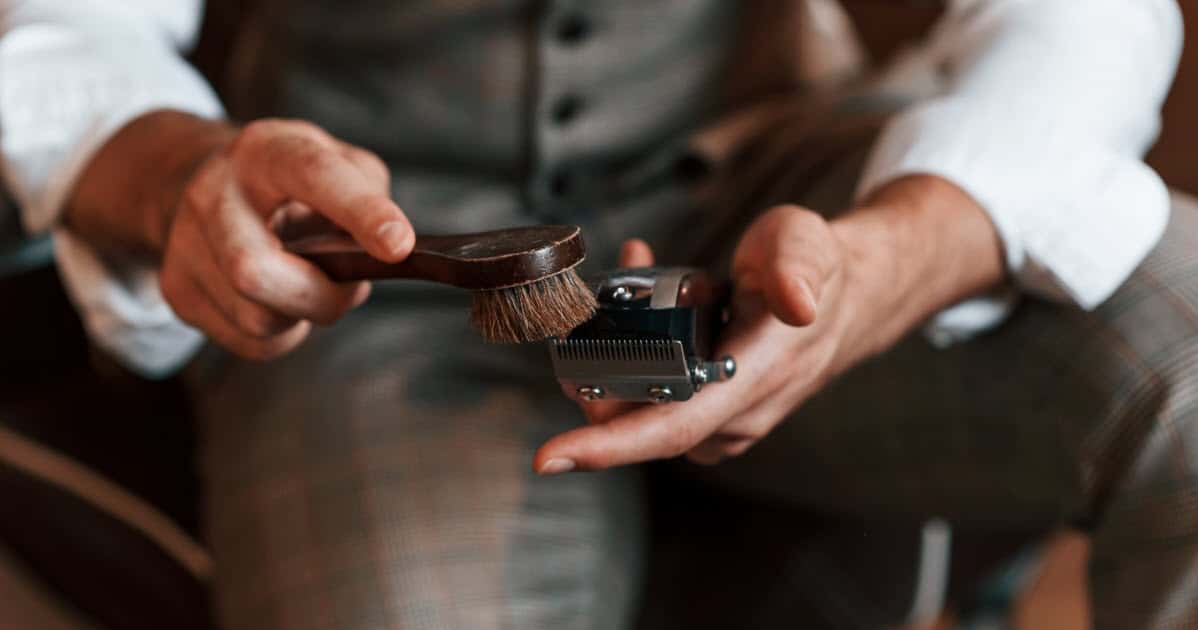
Use a Brush
Most clippers come with a small brush with stiff bristles specifically for cleaning. However, if you’ve lost it or your clippers just didn’t come with one, you can use a toothbrush.
Use the brush to remove as many clippings as you can. Especially be sure to get in between the blades.
PROS
- Easy to use
- Often comes with clippers
- Picks up hair that’s stuck
CONS
- Time consuming
- Easy to lose
Use Compressed Air
Most people have probably used a can of compressed air to clean off their computer or another electronic device. These simply spray bursts of air at high speeds which removes dust and debris.
While it requires going out and buying a bottle of compressed hair, we recommend this option for professionals who need to dust off their clippers quickly during a busy day, possibly even in the middle of a haircut. The burst of air is often strong enough to remove hair in between the blades without removing them.
Most cans of compressed air come with a little tube that attaches to the head. You can use this to direct air into a specific place like between the blades.
PROS
- Fast
- Doesn’t scratch blades
CONS
- Doesn’t come with clippers
- Harder to use
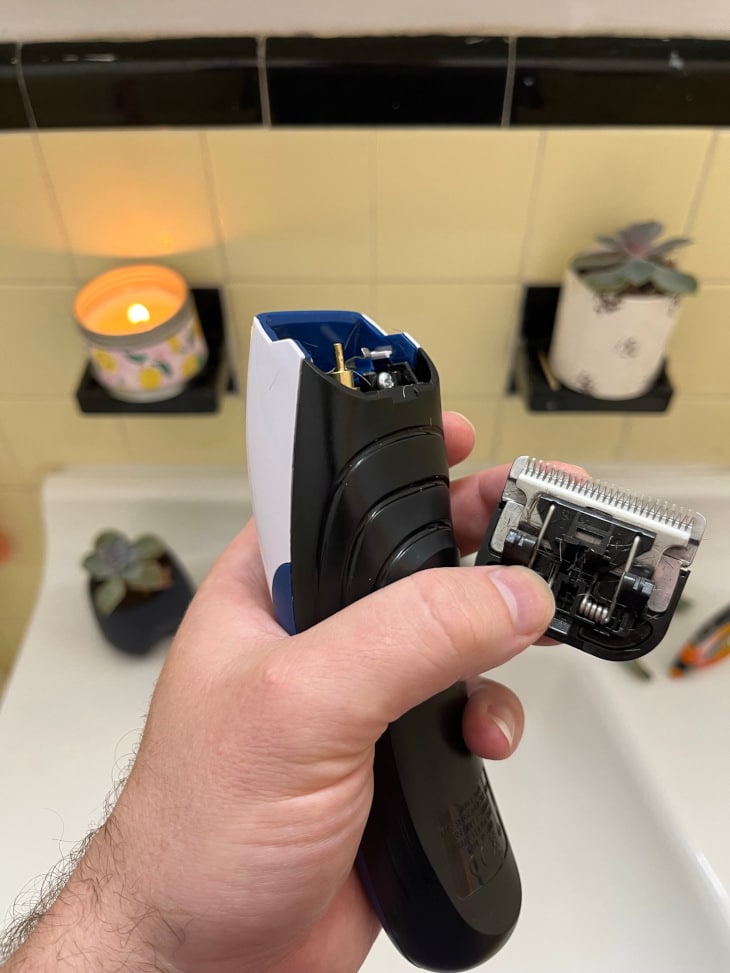
Step 2: Remove the Blades and Guards
After getting the excess clippings off the outside of the blades, it’s time to take them off as well as any accessories that might be attached to them (like guide combs). This will allow you to easily apply the disinfectant without harming the clipper machinery. Plus, there may be more hair clippings trapped deep beneath the blades and in the machinery that you need to brush/blow off. Before removing the blades, make sure the clippers are unplugged or turned off in the case of cordless clippers.
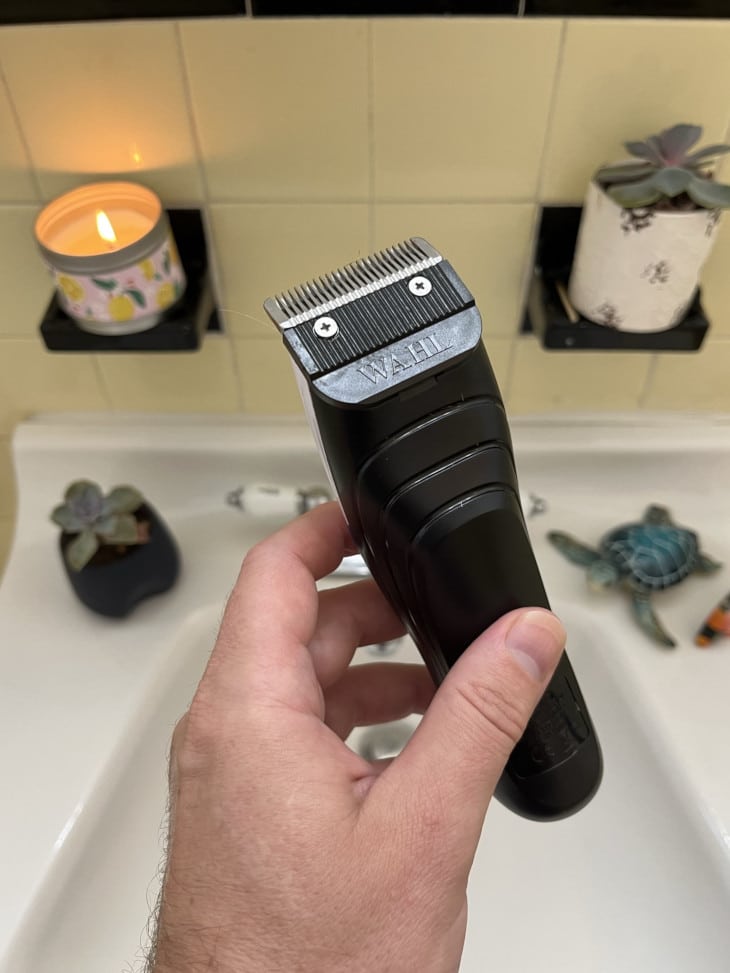
Many clippers—including many from Wahl and from Andis—feature detachable blades, and you can remove them like so:
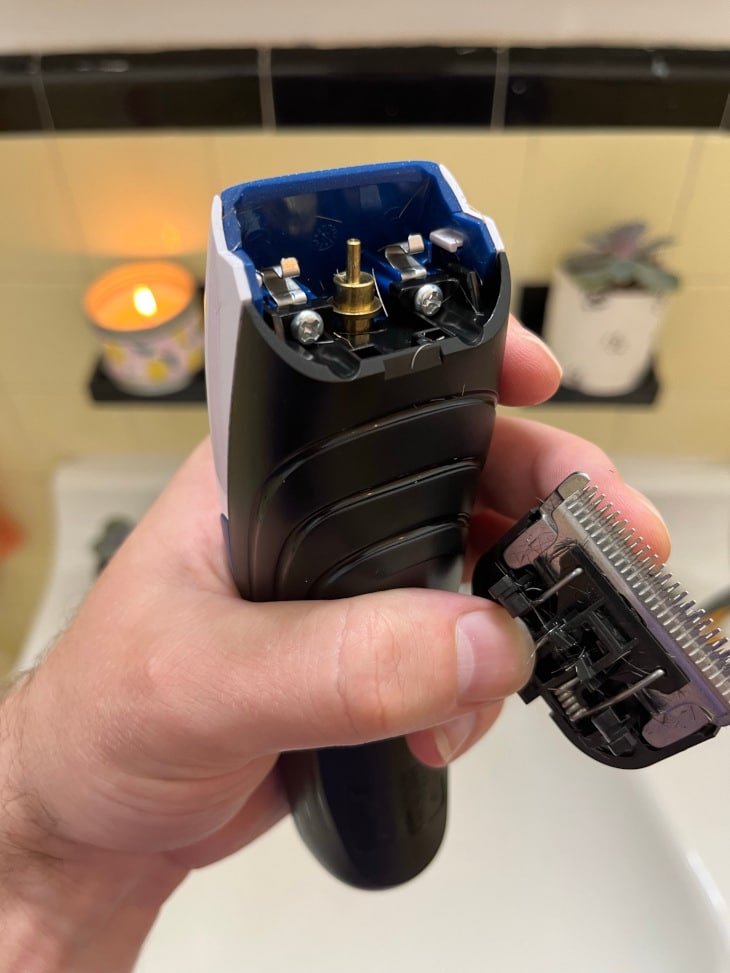
Here’s a picture of us removing detachable blades at home:
If you take a look, you can see all the hairs behind the blades, inside the body of the clippers themselves:
If your blades are not of the detachable variety, they may have two screws at the base that you may need to un-screw. Simply use a screwdriver—usually a Philips-head screwdriver—to remove these screws and you can take off the blades. Make sure you store the screws in a safe place where you won’t lose them while you’re disinfecting the blades.
In reality, removing the blades may not be necessary if you’re a professional just doing a quick clean between clients. If you’re using compressed air and disinfecting sprays, you can often adequately disinfect the blades without taking them off, which is a lot faster and more convenient.
Nevertheless, you should still remove the blades to do a full cleaning every 1-2 days or if you’re using your clippers at home, after each use.
Step 3: Disinfect the Blades
Disinfecting the blades is arguably the most important part of cleaning your hair clippers. Bacteria build up quickly on blades because they pick up bits of oil and skin from hair. These bacteria can cause blade corrosion, which means they’ll work much less effectively and comfortably, and they can also jump from the blades to the skin of a client or you or your family, which may end up causing skin irritation.
Luckily, there are a lot of easy ways to disinfect hair clippers. Some are more suited for professionals while others work better at home.
You can use:
Soap and Water
Soap and water is arguably the easiest way for private clipper users to sanitize them in their own home. After all, just about everyone has a little dish soap on hand.
To use this method, take a cup with warm water and put a few drops of dish soap in it. Swish it around so the soap mixes into the water and starts to foam. Then drop in the blades and let them soak overnight. In the morning, take the blades out and rinse off the excess soap under running water.
PROS
- Materials on hand
- Easy
CONS
- Requires a container
- Doesn’t kill as wide a range of bacteria
- Slow
- May lead to corrosion long-term
Barbicide
Barbicide is a disinfectant with a specific formula designed to kill the bacteria that grow on clipper blades. It’s a staple of any barbershop and usually available with professional barber supplies. It’s great for professionals because it’s fast acting, safe on blades, and specifically designed for a barber’s environment.
Most barbicide comes in bottles, though you may be able to find it applied as a spray. In bottle form, you’ll need to soak the blades in it for the time specified by the manufacturer. You can usually get a quick clean in just about 30 minutes, but soaking the blades overnight produces an ideal deep clean.
PROS
- Clipper-specific
- Safe on blades
- Fast acting
- Available with other barber’s tools
CONS
- Inaccessible to laymen
- Potentially requires container
Clipper Spray
Like barbicide, you can often get specific clipper cleaning solutions in an aerosol spray. This can be the ideal setup for professional barbers because you can quickly spray down the blades between clients without even having to take them off. This keeps them sanitary without spending too much of your valuable time.
You can’t soak the blades in the spray, so if you need to deep clean your clippers overnight, you’ll still need to have barbicide or something like rubbing alcohol on hand.
PROS
- Easy to use
- Fast
- Clipper-specific
CONS
- Not deep cleaning
Rubbing Alcohol
Rubbing isopropyl alcohol is a great way to disinfect hair clippers that doesn’t require any specialty products. We recommend getting a concentration of 70% because the added water allows it to more easily dissolve bits of dust and debris as well as the bacteria so the alcohol can kill them.
The best way to use isopropyl alcohol as a disinfectant is to fill a cup or other container and then soak the blades overnight. That said, if you’re in a hurry, you can sometimes find alcohol in squirt or spray bottles that can work in a pinch, though it’s not as good as barbicide or clipper sprays.
Whether you’ve soaked the blades in alcohol or just sprayed them down, you should rinse them off thoroughly. Alcohol dries quickly, but residue on the blades can still irritate and dry out skin.
PROS
- Easy to find
- Kills most bacteria
CONS
- Not clipper-specific
- Requires a container
- Harsh on skin
White Vinegar
White vinegar is basically an alternative to rubbing alcohol. While it’s not quite as good at killing bacteria, it is a disinfectant, but it’s much milder on skin if there’s residue on the blades. Plus, like alcohol, it’s easy to find vinegar and most people already have some at home.
White vinegar takes a long time to kill bacteria, so definitely make sure you soak the blades in it at least all night. Then rinse them off thoroughly in the morning.
PROS
- Easy to find
- Mild on skin
CONS
- Takes a long time
- Not as disinfecting
- Strong odor
- Requires a container
Step 4: Rinse and Dry the Blades
When you’ve finished disinfecting the blades, you should rinse them off under running water regardless of what method you decided on. Get as much of the disinfectant off as possible as most disinfectants can irritate the skin.
Once you’ve rinsed the blades off, you then need to dry them. This helps prevent corrosion and damage to the machinery when you put the blades back on the clippers.
Air drying is the easiest method. Depending on the climate or humidity in your barber shop or home, most blades dry off in 30-60 minutes. If that’s too long, you can speed up the process by fanning the blades through the air, using a blow dryer without heat, or getting out the compressed air.
You can also use a towel or rag to dry off the blades, but try to use a smooth one that won’t catch the blades and leave lint. It should be clean as well or else you’re just going to get the blades dirty again.
Step 5: Oil the Blades
Before you put the blades back on, you should apply blade oil (or a blade oil substitute of your choosing). In fact, you should apply blade oil between each use whether you clean the blades or not and whether you remove them or not.
To do this, simply take the blade oil that came with the clippers or that you’ve bought separately if it’s specifically designed for clipper blades and apply 2-3 drops to the edge of the blade where the teeth are. Move the clippers about at different angles so that the oil runs over the blades.
This may sound intimidating, but it’s really not, and here’s a quick video from Wahl that displays how quick and easy it can be:
Step 6: Reassemble the Clippers
Now with your clipper blades clean and dry, it’s time to reattach them to the clipper machine itself. This is pretty simple in a technical sense—if you’ve got detachable blades, simply re-attach them, and if you’ve got non-detachable ones, find the screws you put aside and re-assemble all the pieces.
If you’re screwing in screws, keep this in mind: you need to be careful to align the top and bottom blade properly when you replace them and screw in the top blade. Now, what that means will be different for everyone depending on the length they like their blades to cut at, but here’s a good video that shows, generally, how to align the top and bottom blade:
Most professionals will want to have their blades “zero gapped” with the top and bottom blades perfectly aligned to allow for blends and fades and to get the closest and most accurate trim.
To do this, align the two blades as close as possible and then insert the screws into their holes and tighten them about halfway. At this point, you should still be able to maneuver the blades slightly. Make sure the taper adjustment lever is in the short position, then slide the top blade until it’s aligned with the bottom blade as you want it. Hold your finger against the blades to keep them from sliding, and then tighten the screws all the way.
Normally, the bottom blade is a lot sharper, sharp enough to cut the skin. For this reason, you should never let it stick out farther than the top blade. Amateurs should probably not try to fully zero gap their blades and instead leave the top blade overhanging slightly.
Along with aligning the blades correctly, you should also pay attention to their orientation. Both blades should curve inward. That is to say, the top blade curves down while the bottom blade curves up so that both blades touch.
Here’s a video that illuminates all that, if you need some direction:
Once you’ve finished reassembling the clippers, turn them on and let them run for about 30 seconds to fully distribute the oil you applied in step five.
And there you have it! Good work!
Now that you know what you’re doing, let’s look at…

Common Mistakes to Avoid
A big part of knowing how to clean hair clippers is knowing what not to do. Many people make a lot of mistakes when they first get a new set of clippers, these being a few of the biggest and most common. Avoid these mistakes for cleaner, better working clippers.
Cleaning the Blades Too Infrequently
If you remember your high school science class, bacteria multiply astoundingly fast. And believe it or not, they have plenty of food on clipper blades in the form of oil, skin, and even the metal itself.
Since professionals use the clippers on different people, they should at least do a quick clean with a spray between every client and soak the blades in barbicide or a substitute each night. Private individuals using their blades at home can base their cleaning frequency on how often they use the clippers and their own desired level of cleanliness, but it’s still a good idea to clean them after each use.
Cleaning the Blades with the Clippers Running
With convenient options like sprays, you may be tempted to just spritz your clippers while they’re still running. This is a mistake, though. The liquids involved could potentially damage the running motor, and if the blades are moving, you may not get the disinfectant everywhere that you need to. Plus, you may accidentally fling disinfectant all over the place.
Forgetting to Oil the Blades
Oiling clipper blades is essential in and of itself. Blades that aren’t oiled will stop working correctly and may begin to corrode prematurely.
Don’t forget this step. Similarly, don’t forget to run the clippers for about 30 seconds when you’ve finished the whole cleaning process to help distribute the oil evenly across the blades.
Not Cleaning Guards, Combs, and Accessories
Just like your blades, you need to disinfect the plastic guide combs and accessories that you attach to them. While these don’t necessarily corrode like the blades do, they can certainly have bacterial buildup.
Cleaning the guards is simple enough. Just toss them in whatever cleaning solution you decide on along with the blades. You can also spray them down with disinfectant if you’re in a hurry.
Reassembling the Clippers Without Aligning the Blades
It’s easy to overlook aligning the blades when you reassemble the clippers, but skipping this step is not just a hassle but potentially dangerous. If you just quickly screw the blades back on, you may accidentally set the bottom blade longer than the top blade. This could cut your clients’ skin or your own or your family’s if you’re using the clippers at home.
Not Soaking the Blades Long Enough
It takes a long time for even the best disinfectants to fully clean your blades. For a deep clean, you should soak the blades overnight. This is especially true if you’re using an at-home method like vinegar or dish soap.
Even if you’re performing regular quick cleans, you should still perform a long deep clean with a full soaking fairly often. In fact, consider a deep clean every day or two if you’re a professional.
As They Say, Cleanliness is Godliness
Correctly and regularly cleaning your hair clippers is essential not just for health and safety but the function of the clippers themselves. If you’re a professional using your clippers day in and day out, it’s a good idea to develop a regular cleaning routine using one of the methods we listed above like barbicide or clipper spray. This can lead to more comfortable results for your clients and a longer clipper life for you.
Thanks for reading—have fun, be good, and happy clipping!
Michael Morris is the head writer here at Rough and Tumble Gentleman. He's got a ducktail beard and loves Brazilian jiu-jitsu. He's married to the woman of his dreams and lives in Brooklyn, NY.